Magical Moss Rug Guide & Tutorials
Welcome to the guide for your MAGICAL MOSS Rug Kit!
Below you will find all the information you need to create your own mossy oasis to display in your home. We've designed this kit to be used as a rug but it also makes a gorgeous decor piece for your wall or as a table display.
🌼 🌼 🌼
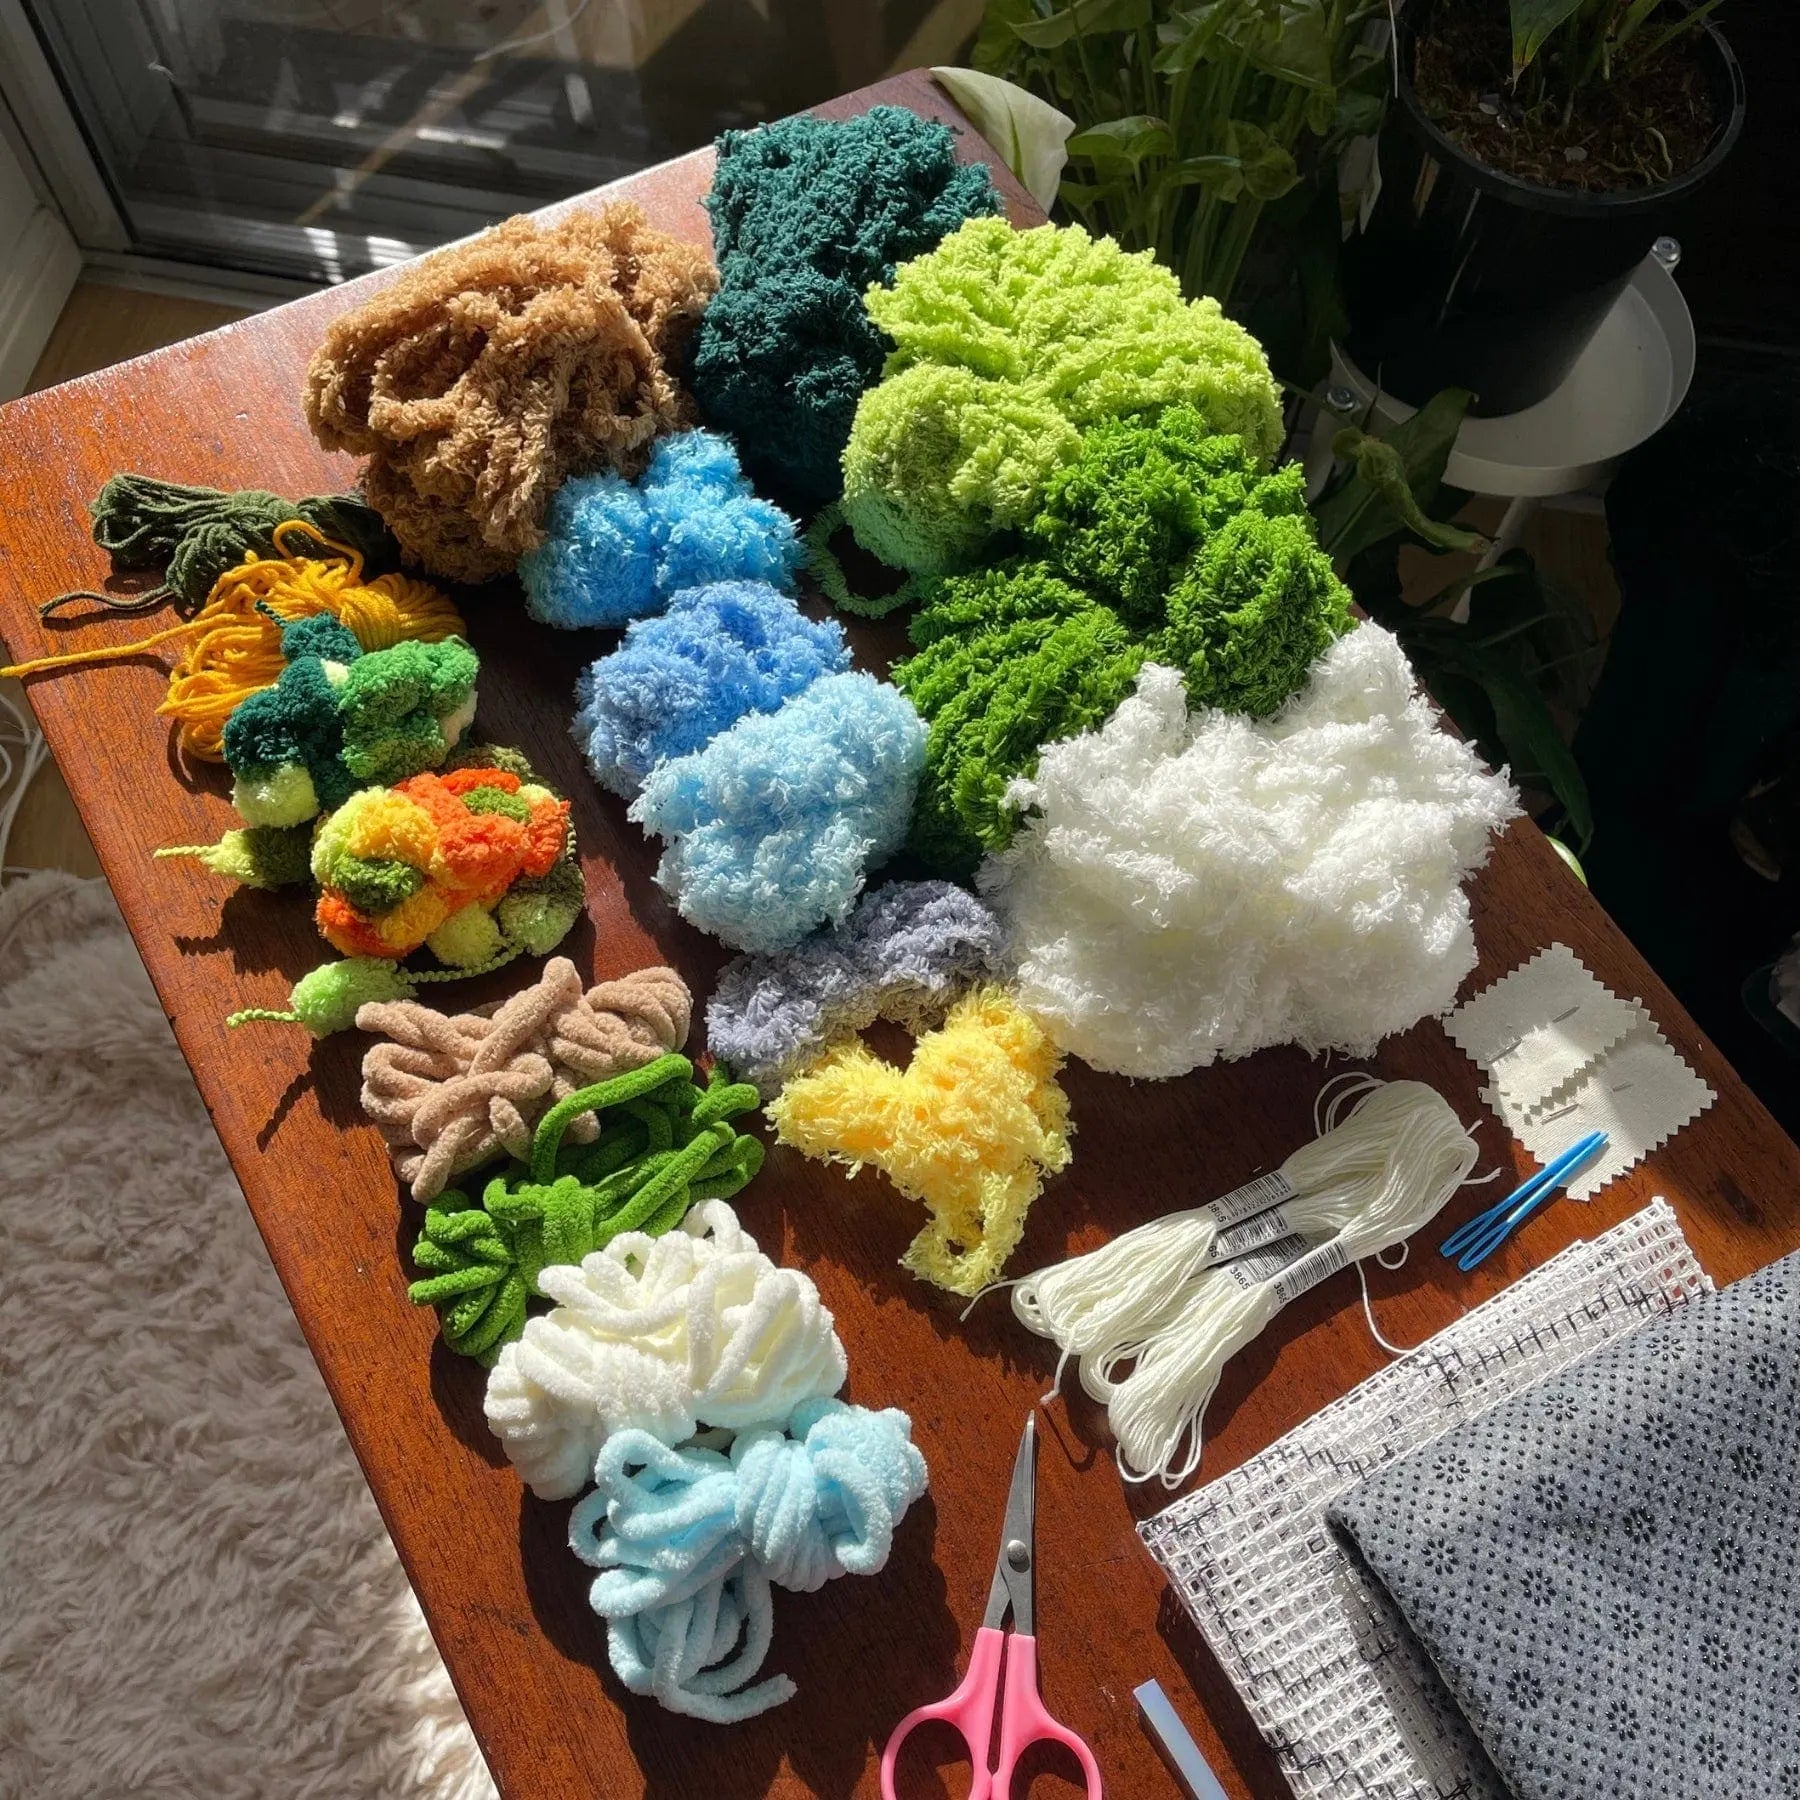
Inside Your Kit
Your moss kit includes ...
Materials:
⭐ Pre-printed canvas base
⭐ Premium felt backing with non-slip grip
⭐ Feather yarn in 10x colours
⭐ Chenille Yarn in 4x colours
⭐ Milk yarn in 2x colours
⭐ Bobble yarn in 2x variegated colours
⭐ 3x full packs of cotton thread
Tools:
⭐ Pom pom scissors
⭐ Small latch-hook (different tool from our other kits)
⭐ Weaving needle
⭐ Steel sewing needles
⭐ Glue spatula
Learning:
⭐ Online instructions and video tutorials
⭐ Pattern template
Additional materials:
Our kits come with everything needed to sew the coaster backing on, but you may want to use fabric glue or hot glue if you have it handy.
You may also want to use sharp craft scissors for cutting your base. Our XL Gold Rug Trimming Scissors are perfect for this kind of project. You can find them here.

Before
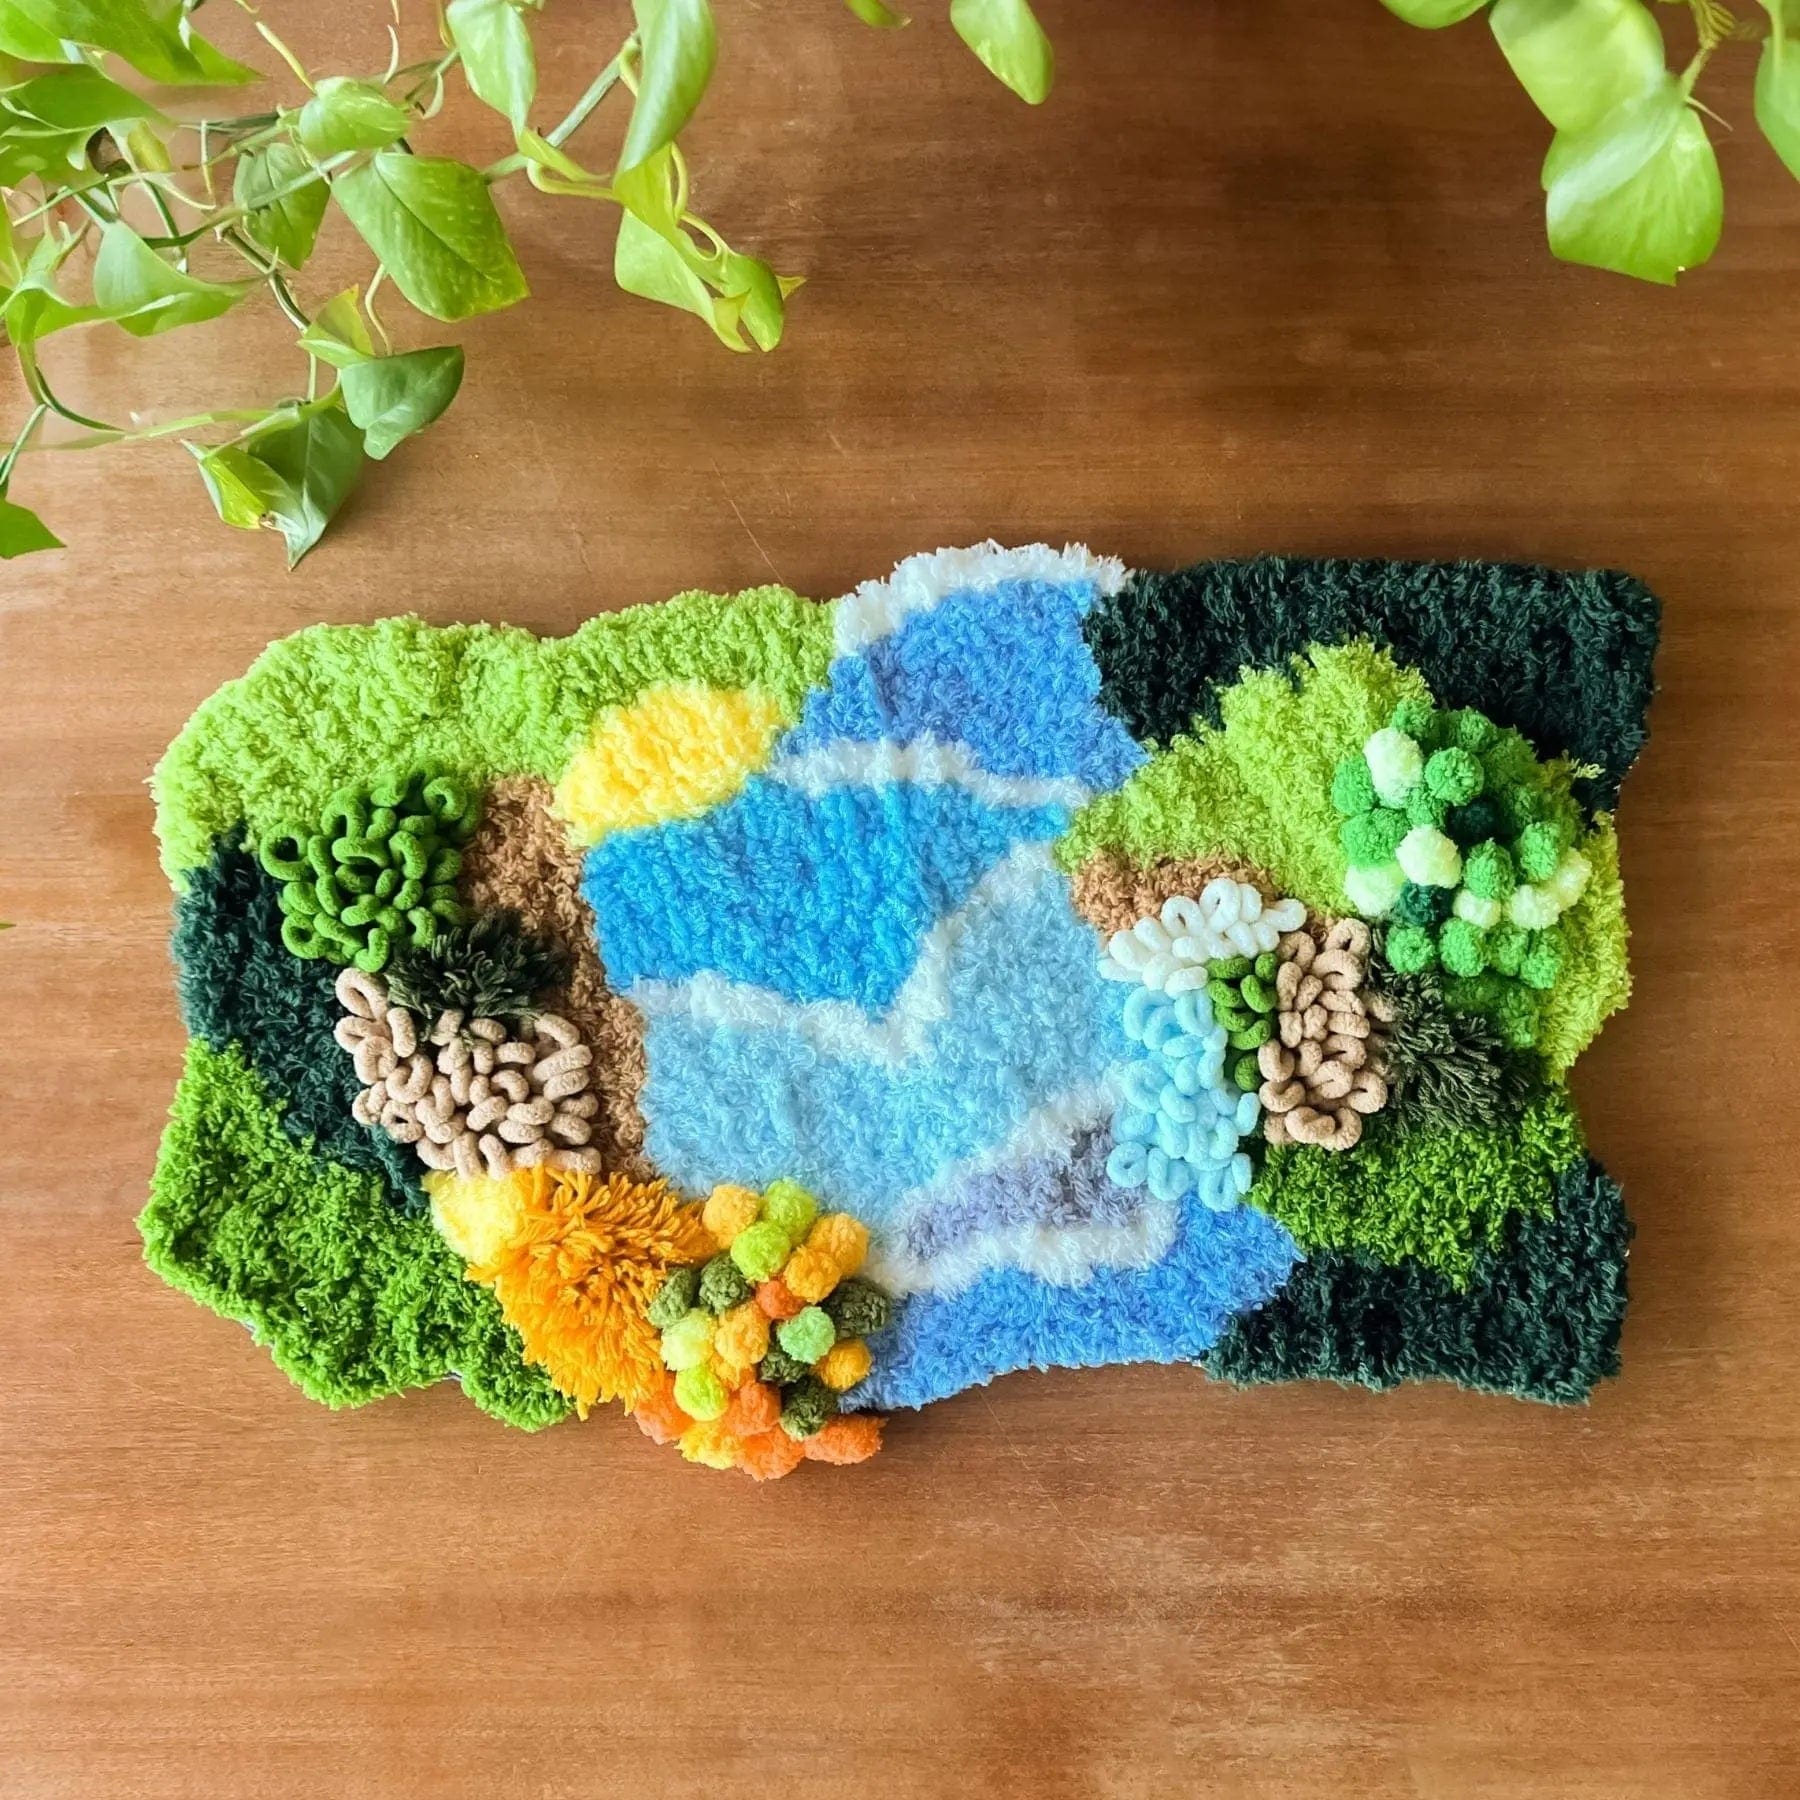
After
Magical Moss Rug Guide
What you'll find inside your kit:
1. Choosing your yarn for each section
Your first step in creating your magical moss rug is to lay out all of your materials and choose which yarn and colours you'd like to use for each section. It's a good idea to do this at the start, to familiarise yourself with your materials.
You can follow the product image and diagrams below to make yours exactly like ours, however I encourage you to get creative and mix/match your yarn colours to make it your own!
Don't put too much pressure on yourself at this stage. Go with colours that feel right, but remember you can always change them later as you begin working on your rug.

The textured sections:
Below you'll find a guide for the textured sections of your rug. You'll be working on these sections first.
Orange: Bobbles (using both veriegated green and orange Bobble Yarn)
Purple: Fuzzy Loops (using green, blue, white and brown Chenille Yarn)
Blue: 'Hair' Moss (using olive and orange Milk Yarn)
You can follow our product image and match each colour so that your finished rug looks exactly like ours. But you can also swap colours and yarn types around.

The woven grass sections:
Next you'll be working on your grassy areas, using your feather yarn. Your kit includes 5x colours of 'earthy' feather yarn:
- Lime green
- Grass Green
- Dark Green
- Brown
- Yellow
The below diagram shows where we have placed these colours, but you can mix and match your colours as you go.

The woven water sections:
Next you'll be working on your water areas, using your feather yarn. Your kit includes 5x colours of 'water' feather yarn:
- White
- Grey-Blue
- Ice Blue
- Bright Blue
- Mid-toned Blue
The below diagram shows where we have placed our blue colours. The white is used around the edges of each blue section to look like bubbles on stream. Just as it is with your previous grass sections, you can mix and match the blue colours here too.

The full diagram:
For easy reference, this is the full diagram of our rug. Including all textured sections, woven grass and water.

2. Weaving your Bobble Yarn
The first area you want to fill in is your bobble yarn. In the first diagram thats indicated by the orange sections. For this you'll need your bobble yarn and your plastic latch-hook.
Follow the below video tutorial to fill in your chosen bobble sections.
3. Creating Fuzzy Loops
Next you'll be creating your fuzzy loops using your chenille yarn. This is indicated by the purple sections. For this you'll need your chenille yarn in your chosen colour and your plastic latch-hook.
Follow the below tutorial to fill in each section of your loops.
4. Latch-Hooking your 'Hair' Moss
Your final textured piece will be familiar to you if you've done one of our latch-hooking kits before. This time we use a slightly different technique though.
You'll use your milk yarn for this section and you'll be cutting it into equal pieces shown in the video below. You'll be using 2x pieces per stitch to give a more dense feel. In order to make 2x pieces more manageable we use a different style of latch-hooking with this hook.
5. Weaving your grass sections
Now it's time to weave in the 'grass' underneath your moss. You'll be using your 5x shades of feather yarn listed above, as well as the plastic weaving needle included in your kit.
Follow the technique in the below video to weave your grass sections. Your rug uses the exact same technique, just on a larger scale.
6. Weaving your water sections
Follow the same technique to weave in the 'water' sections of your rug. You'll be using the 5x shades of blue and white feather yarn listed above and your plastic weaving needle again.
Once you've finished your water, check your whole rug to see if there are any sections left bare. You can fill these in with green or blue to ensure your rug doesn't have any gaps when it's finished.
BONUS: Other techniques for creating texture on your rug
Our Magical Moss rug includes 3x types of textured elements on the rug: bobbles, fuzzy loops and 'hair' moss. But I also have a couple extra ways of that you can add texture if you have leftover yarn at this stage of your rug.
Pom Pom Flowers
You can use your leftover milk yarn or any yarn you have around your home to create pom pom flowers. The below tutorial shows you how to create pom poms without any extra tools, as well as a few variations.
Embroidered Details
You can also use your leftover yarn to embroider details onto your grass or water sections. Our tutorial shows this with milk yarn, but you can also use this technique with your feather yarn or chenille yarn.
Why not add contrasting white or blue flowers onto your green section, using your leftover feather yarn? The options are endless!
This technique also works if you have your own stash of spare yarn at home.
7. Backing your Rug
Congratulations on finishing your magical moss rug! This project is no walk in the park (or roll in the grass) so its a huge achievement to have reached this stage.
There are two options for backing your rug: gluing or sewing.
Gluing your backing is much quicker but it requires a hot glue gun, or tacky fabric glue of some kind. Sewing takes more time, but it creates a stronger backing which can be useful especially if you're planning on moving your rug around frequently.
Our video tutorial below will show you how to do both alternatives. You can also find the written instructions below as well.
Trimming and sewing down your canvas
Start by trimming your canvas, leaving between 1.5-3 inches of space around your rug edging. Then thread your sewing needle with the cotton thread included in your kit - you'll have 5x skeins of white thread, this should be enough to do this step as well as sew the edges of your backing if you choose to. Fold the edges of your canvas over and stitch them down with the thread, this doesn't have to be neat or perfect as it's just to 'pin down' the backing so it doesn't move around.
Backing Your Rug: Sewing
If you don't have access to a hot glue gun, you can only use your needle and thread to make the backing to your rug. Follow the instructions in this video below where we have used a 'no-glue' method.
If you have glue handy but you'd still prefer to make your rug more secure with thread, start your backing process by placing your rug onto the felt canvas, ensuring the non-slip side is facing down. Then use your hot glue in the middle areas of your rug to stick it in place. The purpose of this is to keep your rug from moving around the canvas, rather than to make it secure. Once its stuck down, you can follow the steps in this video to cut out your felt and sew the edges down.
Backing Your Rug: Gluing
If you have access to a hot glue gun, then using this method will be much quicker! You'll be able to complete the backing process in under 30 mins.
Start by placing your rug on top of your grey felt, ensuring the non-slip side is facing down. Use your hot glue first in the middle areas of your rug to stick it in place. These first blobs of glue are to keep your rug from slipping around, and not necessarily to make it secure.
Once your rug is in place, you'll take a sharp pair of scissors (we recommend our rug trimming scissors! But anything sharp will do) and roughly cut out the shape of your rug. It's better to make it too big at this stage, as you can cut your felt down. But if you cut it too small, you can't add more felt!
Once you've cut the grey felt to shape, use your hot glue to secure all around the edge of your rug. Really make sure your edges are stuck down to the felt. Then go in with your scissors again and do any trimming that is necessary!
You might need to repeat this process a couple of times, until you're sure that your edge it secure and your felt is cut to shape.
TIP: If you'd like to add extra security, you can sew the edges as a final step as well. Use the video tutorial above to do this. It can be hard to sew through hot glue, so if you've used a really large amount of hot glue on any edges, this is something to consider.
And you're done! Congratulations on finishing your supersized moss project. We hope you've enjoyed the creative journey and you're proud to display your creation.
Thank you!
All of these tutorials are personally written and filmed by me - Nakisah - the founder of Craft Club. I always love hearing from customers (whether you loved your experience, or there was something you'd like to give feedback on) so please come say hi at hello@craftclubco.com or send us a DM over on Instagram @craft.club.co.
I'm always working on ways to improve our kits so that they are as easy as possible for our incredible customers! So all feedback is welcome (but please be nice haha).
Nakisah x
